Learning how to grow your own cannabis from seeds is an incredibly rewarding experience. It really boils down to a few key things: getting your hands on quality seeds, deciding where you’re going to grow, and giving your plants the right care from start to finish. All in all, you’re looking at a journey of about 3 to 5 months from the moment that little seed sprouts its first root until you’re ready to harvest.
Your Journey From Seed To Harvest Starts Here
Welcome to the definitive guide for growing cannabis from seed. Whether this is your first time getting your hands dirty or you’re just looking for a solid refresher, we’ve got you covered. Watching a tiny, dormant seed transform into a mature, thriving plant is a fascinating process. With the right know-how and a bit of preparation, anyone can pull off a successful harvest.
Success, however, doesn’t start when you put a seed in soil. It begins with two foundational decisions that will influence everything that follows.
Choosing Your Grow Environment
The first big choice you have to make is where you’re going to grow. Are you setting up indoors with grow lights or taking it outside to grow cannabis from seeds under the sun? Both paths have their own unique perks.
- Indoor Growing: This is all about control. You get to be the master of the universe for your plants, dictating the light, temperature, humidity, and airflow. This level of control almost always leads to higher quality, more consistent buds and means you can grow any time of year. A practical example would be setting up a 2×4 foot grow tent in a spare closet, which can comfortably house two to three mature plants.
- Outdoor Growing: This is the natural, old-school way—and it’s a lot cheaper. The sun provides a powerful, full-spectrum light source for free, and plants can get absolutely massive. The trade-off? You’re completely at the mercy of Mother Nature, dealing with weather, pests, and whatever your local climate throws at you. For instance, a grower in Southern California can rely on consistent sun, whereas a grower in the Northeast must be wary of early frosts and summer humidity.
A good way to decide is to just look at your available space. A spare closet can be turned into a perfect little indoor garden, while a sunny balcony or a private spot in the backyard is all you need to get started outdoors.
The Critical Role of Genetics
Your second make-or-break decision is your seeds. The genetics packed inside that tiny shell are hands-down the most important factor in determining your plant’s potential. Starting with high-quality genetics from a trusted source is like building a house on a solid foundation—it’s everything. You’ll end up with healthier, more resilient plants that deliver better yields and the specific traits you’re looking for.
To get a better handle on how genetics shape your plant, it’s worth understanding the difference between Indica and Sativa and what those classifications really mean.
Picking the right genetics isn’t just about finding the highest THC percentage. It’s about matching a strain to your climate, your skill level, and what you want to get out of the final product. A beginner might have a much better time with a tough, forgiving autoflower, whereas a seasoned grower might want the challenge and massive yields of a specific photoperiod strain.
Growing cannabis is a mix of art and science. With good seeds, germination success rates often top 80%, and as home growing becomes more common, the tools and knowledge to succeed are more accessible than ever. The cannabis cultivation market is expanding rapidly, and this guide will give you the knowledge you need to be a part of that success.
Setting Up Your Ideal Grow Environment
Before you even think about popping those seeds, you need to build a home for your future plants. Getting your grow environment dialed in from the start is arguably one of the most important things you’ll do. It’s all about creating a stable, controlled space where your plants can thrive, whether that’s a dedicated grow tent in a spare room or a hand-picked spot in your garden.
Taking the time to get this right now saves you from frantic, mid-grow trips to the supply store and helps you sidestep a ton of common rookie mistakes. Think of it like setting the foundation for a house—if it’s solid, everything you build on top of it will be, too. This initial investment in time and gear pays off big time when you’re looking at healthy plants and a killer harvest.
Choosing Your Grow Medium
The medium is where your plant’s roots live; it’s their entire support system. It’s what delivers water, oxygen, and nutrients, so your choice here directly impacts how often you’ll be watering and feeding.
- Soil: This is the old standby and the most forgiving option if you’re just starting out. A quality, pre-amended potting soil (something like Fox Farm Ocean Forest) comes loaded with enough nutrients to get a young plant through its first few weeks. It makes life easier and provides a great buffer if your pH is a little off.
- Soilless Mix (Coco Coir): Made from coconut husks, coco coir is a fantastic sterile medium. It has great aeration and holds water well, giving you more direct control over nutrients than soil. The catch is that you have to start feeding your plants from day one. A popular brand for this is Canna Coco.
- Hydroponics: This is the advanced, high-tech route where plants grow directly in a nutrient-spiked water solution. A common example is a Deep Water Culture (DWC) system, where roots are suspended in an oxygenated nutrient solution. While it can lead to explosive growth and massive yields, it has a steep learning curve and requires constant monitoring.
For most beginners, a high-quality organic soil mix is the simplest, most direct path to a successful first harvest.
Essential Indoor Grow Equipment
Growing indoors gives you ultimate control over every aspect of your plant’s life. While cannabis is historically an outdoor plant, modern growing has largely moved inside. With today’s tech, growers using LED lights and climate-controlled tents can pull off 3-4 harvests a year, a huge jump from the single outdoor season. The yields are bigger, too, often hitting 400-600 grams per square meter compared to the 150-200 grams you might get outdoors. You can find more details on these modern cultivation methods over at businesswire.com.
Here’s a pretty standard indoor setup. The LED grow light is key—it’s efficient and gives plants the full spectrum of light they need to thrive.
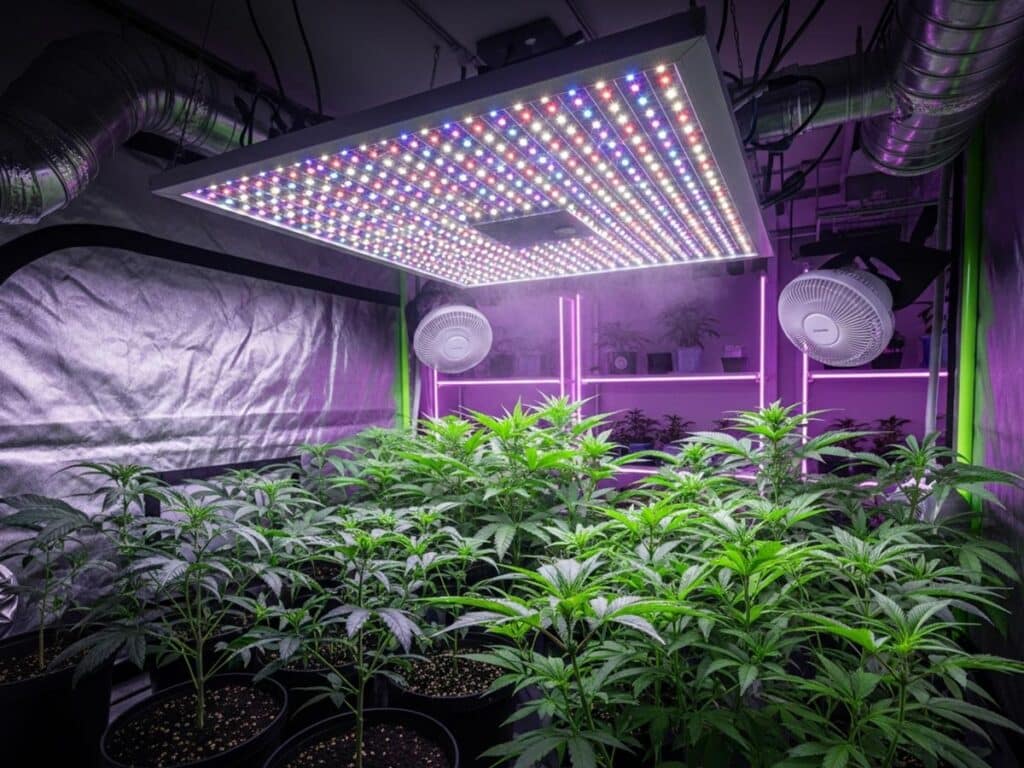
In an indoor grow, this light effectively becomes the sun, powering photosynthesis and driving growth from seedling to harvest.
To get a basic indoor setup off the ground, you only need a few core pieces of gear.
Key Indoor Gear Checklist:
| Component | Description | Budget-Friendly Example |
|---|---|---|
| Grow Tent | This creates a self-contained little world, making it way easier to control light, temp, and humidity. | A 2×2 foot tent is a perfect starting point for 1-2 plants. |
| Grow Light | The single most important piece of your kit. LEDs are the go-to choice now because they’re efficient and don’t get too hot. HPS lights are powerful but they’re also energy hogs. | A 100-watt full-spectrum LED light will do the job for a 2×2 tent. |
| Ventilation | You absolutely need an inline fan and a carbon filter to pull in fresh air and, importantly, keep the smell under control. | A basic 4-inch inline fan kit will work great. |
| Pots | Fabric grow bags are a beginner’s best friend. They promote healthy roots (“air pruning”) and make it really hard to overwater your plants. | Start with 3-gallon or 5-gallon fabric pots. |
A classic mistake I see all the time is skimping on airflow. Stale, stagnant air is an open invitation for pests and mold. Even a small, cheap clip-on fan gently moving air across your plant canopy can make a huge difference in their health, strengthening stems and keeping moisture from building up on the leaves.
Mastering Seed Germination and Early Seedling Care
Alright, your grow space is prepped and ready to go. Now comes the magic: waking up those seeds. This is where your journey from a tiny, hard-shelled seed to a thriving plant really begins.
Germination is simply the process of a seed coming out of dormancy. It cracks open, and the first thing you’ll see is a little white root—the taproot. This is the anchor for the entire plant, so getting this stage right is crucial. All it takes is the right mix of moisture, warmth, and darkness.
Proven Methods for Seed Germination
The whole point of germination is to gently encourage that taproot to emerge. You can plant seeds directly in soil just like in nature, but many growers prefer to “pre-sprout” them. This way, you know for sure the seed is viable before you give it precious pot space.
Let’s look at the three most common ways growers get their seeds started. Each has its pros and cons, and your choice often comes down to personal preference.
Comparing Seed Germination Methods
| Method | Pros | Cons | Success Rate |
|---|---|---|---|
| Paper Towel | High visibility; easy to check progress. Very reliable for most growers. | The delicate taproot can get stuck to the paper and break during transplanting. | 90-100% |
| Soaking in Water | Softens tough shells quickly. Great for older seeds that need extra help. | Seeds can drown if left in the water for too long (over 24 hours). | 80-95% |
| Directly in Soil | Zero risk of transplant shock as the root is never handled. Mimics nature. | No way to know if a seed is a dud until it fails to sprout. Can take longer. | 80-90% |
Ultimately, there’s no single “best” method. The paper towel technique is a classic for a reason—it just works. However, planting directly into your final medium is the safest for the plant, as it completely avoids the stress of being moved.
The Delicate Transition to a Seedling
Once you see a taproot that’s about a quarter to a half-inch long, it’s go-time. That seed is now officially a sprout and needs to be planted immediately. Be gentle here; this is arguably the most fragile moment in the plant’s entire life.
I recommend using clean tweezers or very clean hands to pick up the germinated seed. Place it in a small hole in your soil or starter plug, making sure the taproot points down. Lightly cover it with about a quarter-inch of your medium. Whatever you do, don’t pack the soil down. The seedling needs to push its way to the surface without a struggle.
This simple visual breaks down the early milestones. The key takeaway is to wait until the plant has its first set of true leaves before even thinking about transplanting it to a bigger pot. Those initial leaves give it the energy reserves it needs to handle the move.
Creating the Ideal Seedling Environment
Your sprout is now a seedling. For the next week or two, its needs are incredibly simple but also very specific. Young seedlings are fragile—they’re easily overwhelmed by intense light and notoriously prone to damping off from overwatering.
A common rookie mistake is treating them like miniature versions of adult plants. They aren’t. For the first few days, they draw energy from their first round leaves, which are called cotyledons. You can read more about these embryonic plant leaves if you’re curious. The first set of iconic serrated “true” leaves will appear right after.
To give your seedlings the best start, dial in these four factors:
- Light: Keep it gentle. A simple CFL bulb or a dimmable LED grow light set far away is perfect. Too much light will scorch them.
- Humidity: Aim for a humid environment, around 60-70%. High humidity allows the seedling to absorb some moisture through its leaves while its root system is still developing. A cheap and easy way to do this is by placing a clear plastic cup or half a plastic bottle over the seedling to act as a humidity dome.
- Temperature: Keep things cozy, between 70-78°F (21-26°C). Consistent warmth encourages roots to grow strong and healthy.
- Watering: This is the big one. Do not overwater. Let the top inch of soil dry out completely before giving it a small amount of water. Overwatering is the number one killer of seedlings; it suffocates the roots and leads to rot.
Give your seedling a couple of weeks in this pampered environment, and it will build a robust root system, ready for the explosive growth of the vegetative stage.
From Leafy Growth to Bud Production: The Vegetative and Flowering Stages
Once your seedling has a solid root system, it’s ready to enter the main growth phase. This is the vegetative stage, and it’s all about building a strong, sturdy plant framework. Think of it as constructing the factory before the production line starts. During this period, your plant’s entire focus is on getting bigger, stronger, and bushier, developing the stems and leaves it needs to support a heavy harvest of buds later on.
This is your chance to really shape the plant. The care you give it now has a direct line to your final yield. A healthy, well-structured plant can hold more weight and soak up more light, which translates directly to a bigger harvest. For photoperiod strains, you control how long this stage lasts—it can be anywhere from three to sixteen weeks, but most indoor growers stick to a 4-8 week veg time.

Dialing in The Vegetative Environment
During the veg stage, your plant is like a hungry teenager—it’s got an almost endless appetite for light and nutrients. Your job is to create the perfect environment to fuel this explosive growth.
The light cycle is absolutely critical. For an indoor grow, you’ll want your lights on an 18/6 schedule, meaning 18 hours on and 6 hours off. This long “day” simulates the peak of summer, telling the plant to pack on as much growth as possible. Some growers even run their lights 24/7, but giving the plant a short dark period can help reduce stress and trim your electricity bill.
When it comes to feeding, vegetative plants crave nitrogen (N). This is the primary nutrient responsible for all that lush leaf and stem growth. You’ll need to use a fertilizer mix made specifically for the vegetative stage, which will always have a higher N value in its N-P-K ratio. A popular example is a nutrient line with a 3-1-2 NPK ratio for this stage.
Getting Hands-On With Plant Training
This is where you get to play sculptor and guide your plant’s growth for maximum yield. If left alone, a cannabis plant usually grows like a Christmas tree, focusing all its energy on a single main cola at the top. Training breaks this “apical dominance,” encouraging the plant to develop multiple main colas and create a flat, even canopy where every single bud site gets drenched in light.
Two of the easiest and most effective methods for beginners are topping and Low-Stress Training (LST).
- Topping: This is a high-stress technique, but it’s simple. You just snip off the very top of the plant’s main stem. This forces the plant to send its growth energy to the two nodes just below the cut, turning one main stem into two. A good time to do this is when your plant has 4-5 nodes (sets of leaves). Just take a pair of sterile scissors and snip the newest shoot right above the next set down.
- Low-Stress Training (LST): This is a much gentler approach. Instead of cutting the plant, you carefully bend the main stem and side branches down, tying them in place. For example, you can use soft plant ties to gently pull the main stalk until it’s horizontal with the soil, securing it to the rim of your pot. This simple trick exposes all the lower branches to direct light, encouraging them to grow upward and become their own main colas.
Training isn’t just about getting more buds—it’s about getting better buds. An even canopy ensures light is distributed equally, which prevents those small, airy “larf” buds from forming on the shaded, lower parts of the plant.
The Big Switch: Triggering The Flowering Stage
After a few weeks of energetic growth, it’s time to flip the switch and kick off the flowering stage. This is the moment you’ve been waiting for. The plant will now shift its focus from growing leaves and stems to producing the sticky, resinous buds you’re after.
For indoor photoperiod strains, you trigger this change yourself by adjusting the light cycle. You’ll switch your light timer from 18/6 to a strict 12/12 schedule—12 hours on, 12 hours off. This change mimics the shorter days of autumn, signaling to the plant that winter is coming and it’s time to reproduce.
It is absolutely vital that the 12-hour dark period is completely, totally dark. Even a tiny light leak from your tent or a glowing power strip can confuse the plant, causing it to revert to veg or, worse, develop hermaphroditic traits. This natural response of plants to the length of day or night is a phenomenon known as photoperiodism.
Supporting Your Plants Through The Final Stretch
The flowering stage brings a whole new set of needs. The plant’s diet changes dramatically; it now needs way less nitrogen and a lot more phosphorus (P) and potassium (K). Phosphorus is the key to building dense buds, while potassium is crucial for producing resin and maintaining overall plant health. Make sure you switch to a “bloom” or “flower” specific nutrient formula to give your plants what they need.
Within one to three weeks of flipping to 12/12, you’ll see the first signs of flowers. Look closely at the nodes—the little junctions where leaves meet the main stem. You should spot tiny, white, hair-like pistils emerging, which are the very first signs of female flowers. Soon, these will cluster together to form the colas. This initial period is often called “the stretch,” as many strains can double in height during these first few weeks before they settle in and focus all their energy on packing on weight.
Harvesting, Curing, And Storing Your Cannabis
You’ve done it. You’ve guided your cannabis plants from tiny seeds to towering, bud-laden beauties. All that hard work comes down to this final, crucial phase. Getting the harvest, cure, and storage right is what separates good homegrown from truly exceptional cannabis. It’s where you lock in the potency, flavor, and aroma you’ve spent months building.
Don’t rush this part. It’s a common rookie mistake that can unfortunately sabotage an otherwise perfect grow.
The whole game hinges on timing. Chopping your plants down too early or too late can drastically change the final product’s effects. Forget the calendar; the plant tells you when it’s ready. To get the timing right, you need to get up close and personal with the trichomes.
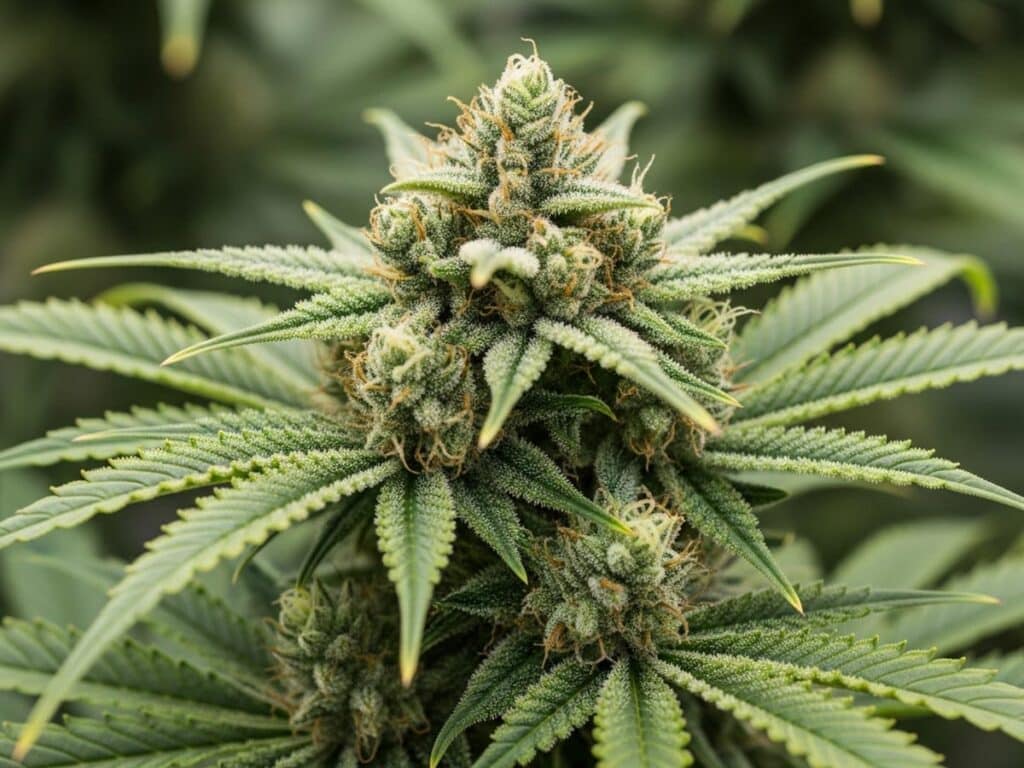
Reading the Trichomes for Peak Potency
Trichomes are those tiny, sparkly, mushroom-shaped glands covering the buds. They’re the microscopic factories producing all the good stuff—cannabinoids like THC and CBD, and the terpenes that create those amazing smells and flavors. You can’t see them well with the naked eye, so grab a jeweler’s loupe or a cheap digital microscope.
When you zoom in, you’ll see the trichomes move through three clear stages of maturity:
- Clear Trichomes: They look like little glass mushrooms. At this point, the plant is still in full production mode, and THC levels are climbing. Harvesting now is too soon and often leads to a less potent, sometimes racy and anxious high.
- Cloudy/Milky Trichomes: This is the sweet spot for peak THC. When the majority of trichomes have shifted from clear to a milky, opaque white, you’ve reached maximum psychoactivity. For a powerful, energetic effect, this is your target window.
- Amber Trichomes: As THC begins to degrade, it converts into CBN (cannabinol), turning the trichome heads a rich amber color. CBN is known for its sedative qualities. If you wait until you see a lot of amber, you’re steering the effects toward a more relaxing, body-heavy, “couch-lock” experience.
Many seasoned growers aim for a balanced high by harvesting when the trichomes are roughly 70% cloudy, 15% amber, and 15% still clear. This blend tends to capture peak potency while adding a nice, mellow body feel without being overly sedating.
The Art of Trimming and Drying
Once you’ve made the call to harvest, it’s time to chop and trim. Trimming is the process of removing the large fan leaves and the smaller, resin-dusted “sugar leaves” from around the buds. You have two main approaches here: wet trimming (trimming right after you chop) or dry trimming (trimming after the plant has dried).
Wet trimming is generally faster and easier, but some growers feel that dry trimming preserves more terpenes, resulting in a more flavorful and aromatic final product. It really comes down to personal preference.
After the trim, you need to dry the buds slowly. Hang the trimmed branches in a dark, climate-controlled room.
Your Ideal Drying Room:
- Temperature: Stick between 60-70°F (15-21°C).
- Humidity: Keep it steady at 45-55%.
- Airflow: You need gentle air movement, but don’t point a fan directly at your buds. Pointing a small fan at a wall is a great way to keep air circulating without over-drying them.
Patience is key here. The drying process usually takes 7 to 14 days. You’ll know they’re ready for the next step when the smaller stems snap cleanly instead of bending.
Curing: The Secret to Smoothness and Flavor
Drying gets the moisture out, but curing is what develops the real quality. This slow process breaks down chlorophyll (which causes a harsh, grassy taste) and allows the terpenes to mature fully. The result is a much smoother, tastier, and more aromatic smoke.
To start the cure, gently place your dried buds into airtight glass jars, filling them about three-quarters of the way to leave a little air.
For the first week, you’ll need to “burp” the jars a couple of times a day. Just open the lids for 5-10 minutes to let moisture escape and fresh air circulate. After that first week, burping once every few days is plenty. A good cure takes at least two weeks, but for connoisseur-grade results, four weeks or more is even better.
Long-Term Storage Solutions
Properly cured cannabis can stay fresh and potent for a long time if you store it right. Its main enemies are light, heat, and air. While glass jars are great, if you’re looking to preserve your harvest for months, it’s worth investing in the right gear. To see what works best, check out our guide on the best cannabis storage containers. Protecting your buds properly ensures all your hard work pays off when you’re finally ready to enjoy it.
Got Questions About Growing From Seed? Let’s Talk.
Taking that first step to grow your own cannabis from seed can feel a little daunting, and it’s totally normal to have a few questions pop up. Getting straight answers from the get-go is the best way to build confidence and avoid some of the classic rookie mistakes that can drive you crazy.
One of the first things growers ask is, “How long is this actually going to take?” From seed to harvest, you’re generally looking at a window of about 3 to 5 months. Of course, this timeline can stretch or shrink depending on the genetics you’re running and how you choose to grow.
Should I Start with Autoflower or Photoperiod Seeds?
If you’re just getting your feet wet, I almost always recommend starting with autoflower seeds. They are incredibly forgiving and take a lot of the guesswork out of the equation.
Autoflowers are bred to flip from vegging to flowering all on their own, based on age rather than a change in the light schedule. This means you don’t have to worry about one of the most crucial management steps.
They’re also quick. Many autoflowers are ready for harvest in just 10 to 12 weeks from the day they pop out of the soil. Their smaller, more compact stature makes them perfect for discreet grow tents or tight spaces.
On the flip side, photoperiod strains put you in the driver’s seat. The plant will keep growing bigger and bigger as long as it gets 18 or more hours of light each day. It’s entirely up to you when to trigger the flowering stage by switching your light timer to a 12/12 cycle. This level of control can lead to much bigger plants and heavier yields, but it definitely demands more attention.
What are the Biggest Mistakes New Growers Make?
You can learn a lot from messing up, but it’s a whole lot cheaper and less frustrating to learn from someone else’s mistakes. When it comes to growing cannabis, two issues seem to trip up beginners more than anything else.
The undisputed champion of new grower mistakes is overwatering. It’s so easy to love your plants to death. Cannabis roots need to breathe, and when the soil is constantly soaked, you’re essentially suffocating them. A good rule to live by: let the top inch or two of soil become completely dry to the touch before you even consider watering again.
The other big one? Completely ignoring the pH of your water. If your water’s pH is off (the sweet spot for soil is 6.0-7.0), the plant literally can’t absorb the nutrients you’re trying to feed it. This is called “nutrient lockout,” and it’ll have you chasing your tail thinking you have a deficiency when the real problem is absorption.
A simple pH testing kit is one of the best small investments you can make. Getting in the habit of checking and adjusting your water’s pH will save you from some major headaches down the road. It ensures your plants can actually use the food you provide. As you get closer to a successful harvest, you might want to dive deeper into what full-spectrum cannabis means and why it’s a goal for many growers.
At Elevation Headquarters, we provide the highest quality seeds, clones, and expert advice to ensure your growing journey is a success from the very beginning. Elevate your experience by visiting us at Our Cannabis Shop.