Let’s be real: your grinder is the unsung hero of your cannabis toolkit. But if you’re like most people, it’s probably caked with sticky residue. Learning how to clean a weed grinder isn’t just a chore—it’s the single best thing you can do to upgrade your entire experience. The secret? For a metal grinder, a quick bath in isopropyl alcohol works magic. Got a plastic one? Stick to hot, soapy water. This simple habit unlocks better flavor, smoother operation, and more value from your flower.
Why a Clean Grinder is Non-Negotiable
Before we dive into the how, let’s talk about the why. A grinder gummed up with old resin isn’t just a minor annoyance; it actively sabotages every session. Imagine trying to chop fresh herbs with a knife covered in last week’s dinner. It’s messy, frustrating, and ruins the final product.
When your grinder’s teeth are clogged, that smooth, effortless twist becomes a sticky, wrist-straining battle. This isn’t just frustrating—it leads to a chunky, uneven grind. The result? Your flower burns too fast in some spots and not at all in others, wasting precious material and delivering a harsh, unpleasant hit.
Unlock Purity, Flavor, and Potency
Beyond the mechanics, a dirty grinder is a flavor killer. Old, oxidized plant matter stuck in the teeth imparts a stale, bitter taste to your fresh, fragrant bud, completely masking its unique terpene profile. It’s like pouring stale coffee into a cup of premium espresso.
Worse yet, that sticky buildup is a breeding ground for mold and bacteria you definitely don’t want to inhale. In fact, heavy resin buildup can slash a grinder’s efficiency by up to 60% in just a few months. Think about the care that goes into cultivating quality cannabis—don’t let a dirty grinder be the reason it goes to waste.
A clean grinder isn’t just about a smooth spin; it’s your ticket to preserving the flavor, potency, and purity of your investment. A simple twenty-minute cleaning session can revolutionize your entire cannabis experience.
Ultimately, a clean grinder ensures every session is as fresh and flavorful as it was meant to be. It guarantees you get the full value from your stash, which is a goal we all share. A perfect grind is essential, as you’ll see in our guide on how many grams are in a typical joint. Treat your tools with respect, and they’ll reward you every time.
Your Ultimate Grinder Cleaning Toolkit
Before you start unscrewing pieces, let’s set you up for success. Assembling your supplies first transforms a potential sticky mess into a streamlined, satisfying process. Trust me, you don’t want to be fumbling for a Ziploc bag with resin-coated fingers.
The right tools for the job depend entirely on one thing: your grinder’s material.
For Metal Grinders
If you own a metal grinder, your secret weapon is isopropyl alcohol. I always recommend a bottle that’s 90% or higher—it dissolves that stubborn, sticky resin in a fraction of the time compared to lower concentrations.
You’ll also need a sealable container like a Ziploc bag or a small glass jar for soaking, plus a small, stiff brush to detail the threads and teeth. An old toothbrush is a perfect, no-cost option.
For Plastic and Acrylic Grinders
Now, if you’re working with a plastic or acrylic model, step away from the alcohol. Isopropyl can degrade, warp, or even crack the material, leaving you with a cloudy, damaged tool.
For these, the solution is beautifully simple: warm water and a few drops of dish soap.
Here’s a pro tip that has saved me countless headaches: always work over a tray or a layer of paper towels. This simple step contains the mess and, more importantly, catches any valuable kief that gets dislodged. If you’re looking to make the most of every last trichome, that salvaged material is perfect for learning how to make edibles at home.
To make it foolproof, here’s a quick-glance guide to grabbing the right tools.
Essential Cleaning Tools by Grinder Type
| Tool | Metal Grinder | Plastic Grinder |
|---|---|---|
| Cleaning Agent | 90%+ Isopropyl Alcohol | Hot Water & Dish Soap |
| Scrubbing Tool | Small Brush / Toothbrush | Small Brush / Toothbrush |
| Soaking Container | Sealable Bag or Jar | Bowl or Sink |
| Drying Surface | Towel or Paper Towel | Towel or Paper Towel |
Using the right kit not only guarantees a sparkling clean but also protects your grinder from accidental damage, ensuring it performs flawlessly for years to come.
The Isopropyl Method: How to Make Your Metal Grinder Like New
When your trusty metal grinder starts fighting back, it’s time for the ultimate deep clean with isopropyl alcohol. This is the undisputed champion for dissolving the caked-on resin that soap and water can’t touch. With this method, you can restore your grinder to its original, factory-fresh glory.
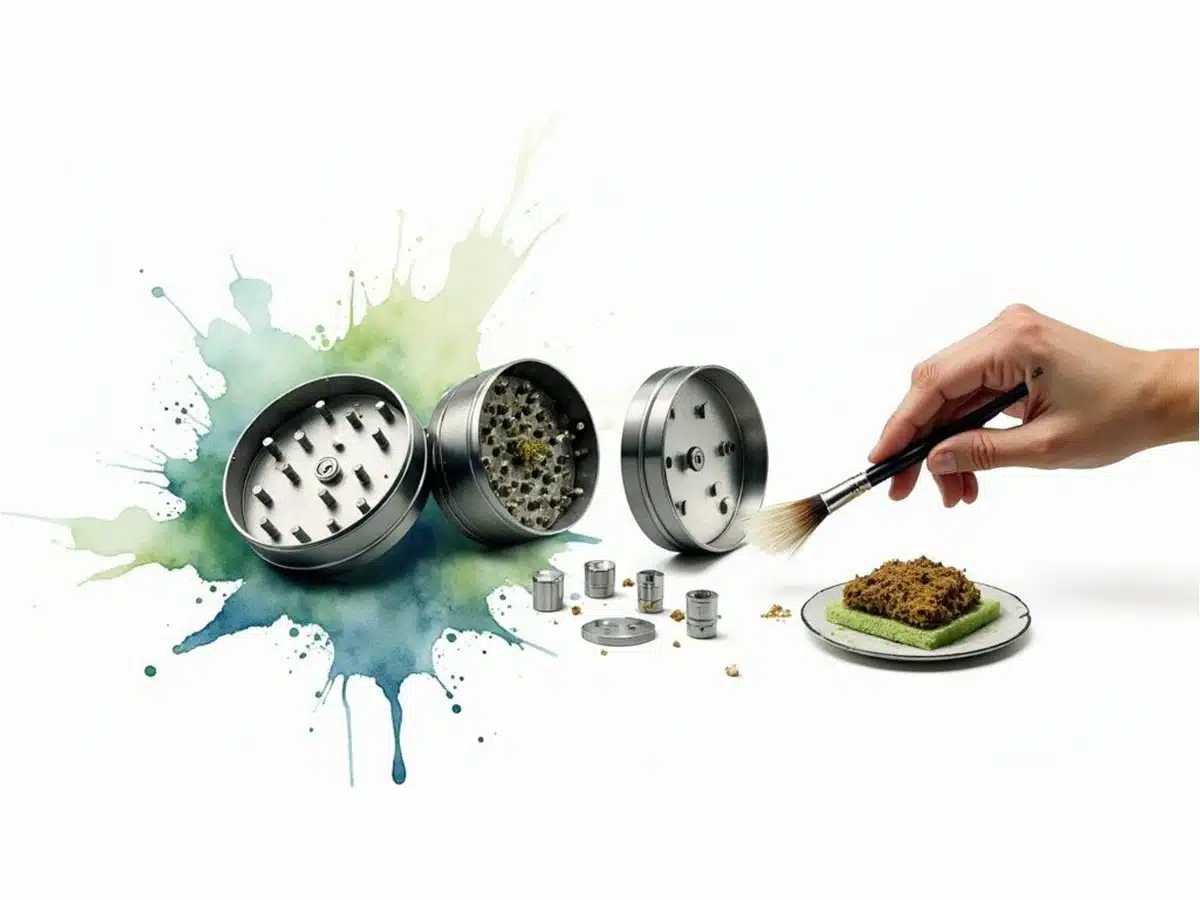
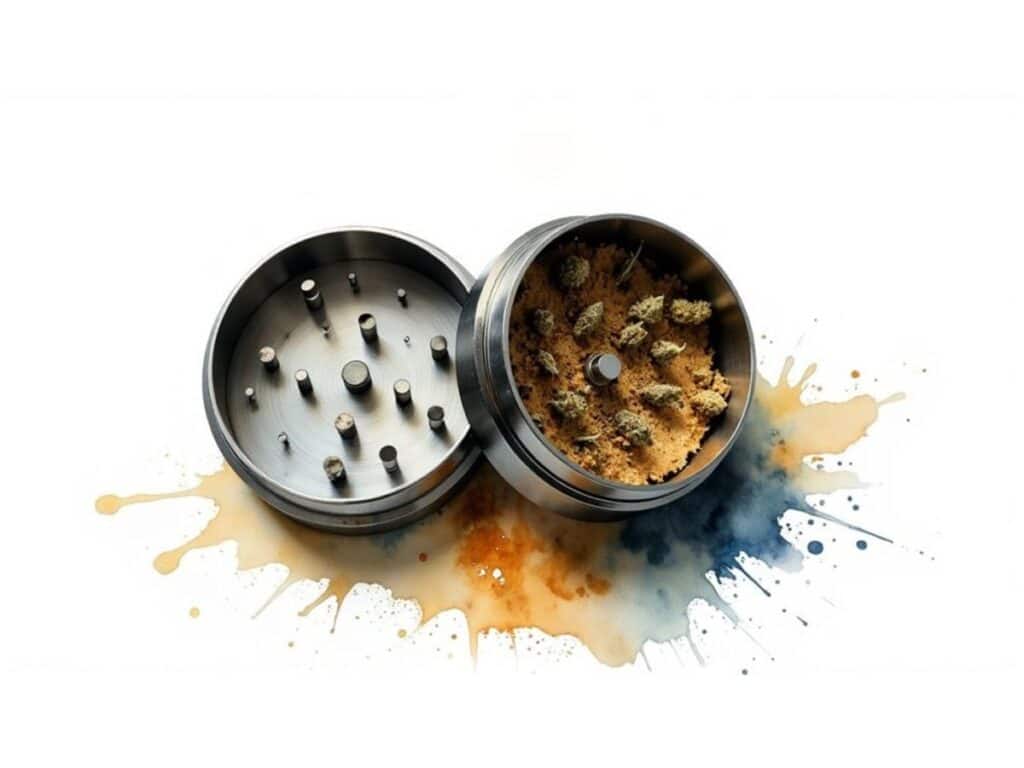
First, completely disassemble your grinder. Pro move: do this over a small tray or a piece of paper to catch any loose herb or precious kief. You’ll be amazed at what you can recover.
Here’s a trick I swear by for really stubborn buildup: pop the separated pieces into the freezer for about 30 minutes. The cold makes the sticky resin brittle, allowing you to tap a significant amount of it loose before you even begin the main cleaning process.
The Deep Soak and Scrub
With your grinder in pieces, grab a sealable plastic bag or a small glass jar. Place all the metal components inside and pour in enough isopropyl alcohol to submerge them completely. Remember, 90% or higher is your best bet for maximum effectiveness.
Now, let it soak. I find that 30 minutes is the sweet spot for the alcohol to work its magic. You’ll literally watch the resin melt off the metal, turning the clear liquid into a dark, murky tea. For an even faster clean, give the bag or jar a vigorous shake every 10 minutes.
It’s that simple—no complex equipment required.
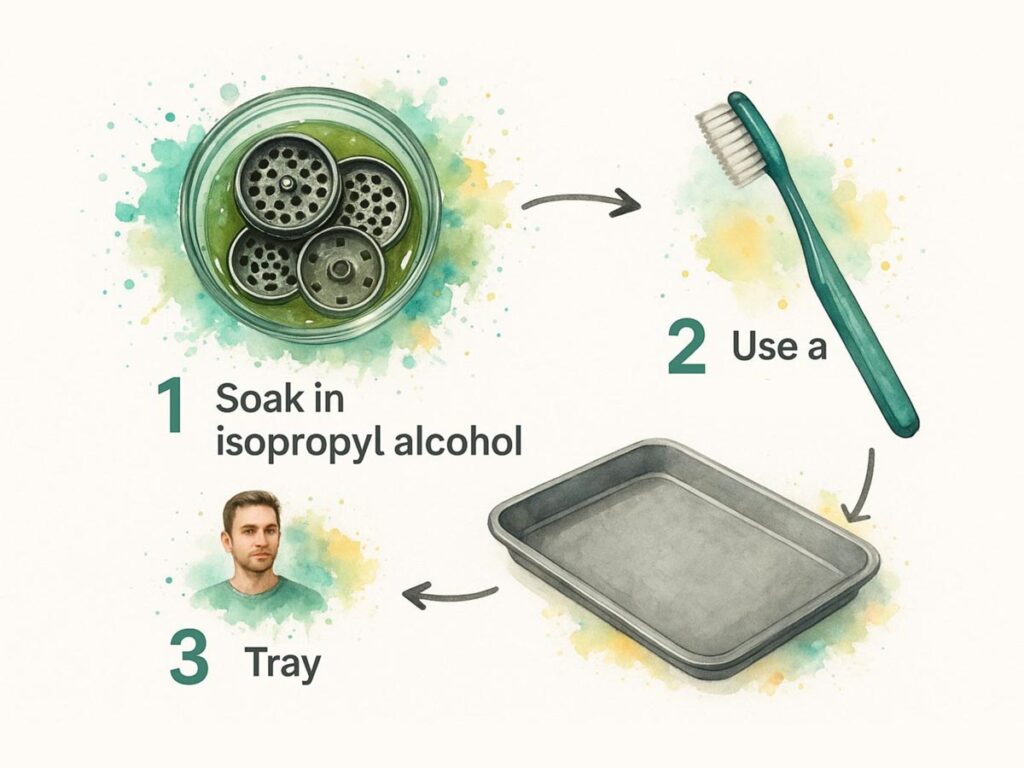
After the soak, it’s time for the finishing touches. Remove the pieces and use a small brush to obliterate any lingering residue. An old toothbrush or a small cleaning brush is perfect. Pay close attention to the grinder’s teeth, the threads where the chambers connect, and the delicate kief screen.
This powerful soak-and-scrub technique is incredibly effective, achieving a 95-100% removal rate of stubborn buildup. It’s no surprise that over 70% of cannabis accessory shops recommend this as their go-to cleaning method.
The Critical Final Rinse
Don’t cut corners on this last step. Once you’ve scrubbed every piece, rinse them thoroughly under hot running water. You need to ensure all residual alcohol and loosened plant matter are completely washed away.
Finally, lay the clean parts on a towel and let them air dry completely. Be patient. Any lingering moisture will cause your fresh herb to clump, undoing all your hard work. I recommend giving it at least an hour to be safe.
Once everything is bone dry, reassemble your grinder. You’ll feel the difference immediately—a smooth, effortless twist, just like the day you bought it.
Safely Cleaning Plastic and Acrylic Grinders

If your daily driver is a plastic or acrylic grinder, you need a gentler approach. These materials simply can’t withstand the harshness of solvents. Using isopropyl alcohol is a guaranteed way to cause cosmetic damage like cloudiness and, over time, can even make the plastic brittle and prone to cracking.
So, what’s the right way? Keep it classic: hot water and a little dish soap. This simple, safe combination has more than enough power to break down sticky resin without harming the grinder itself.
Plastic grinders are incredibly popular, making up about 25% of the market, but they require mindful maintenance. A 15–20 minute soak in hot water—around 80°C/176°F—with a mild detergent will remove over 85% of the buildup. It’s the ideal way to get your grinder sparkling clean without risking any damage. For a deeper dive, explore these best cleaning practices for various grinders.
A No-Soak Alternative: The Freezer Method
Don’t want to mess with water? There’s another brilliant, completely dry technique. Just disassemble your plastic grinder and place all the pieces in the freezer for about an hour.
The freezing temperature transforms the sticky, stubborn resin into a hard, brittle substance. After an hour, take it out and give each piece a few firm taps over a tray. You’ll be amazed at how much gunk simply shatters and falls right off. For any remaining stubborn spots, a small, stiff brush or a toothpick will easily finish the job.
This freeze-and-scrape technique is perfect for a fast, water-free clean-up. It’s particularly useful when you’re short on time or want to salvage every last bit of material without getting it wet.
At the end of the day, the goal is to maximize the lifespan and performance of your tools. By sticking to these safe, solvent-free methods, you’ll ensure your plastic or acrylic grinder remains a dependable part of your setup.
Pro Tips for Effortless Long-Term Grinder Maintenance
A deep clean is fantastic, but the real secret to a grinder that always performs at its peak is consistent, minimal upkeep. Think of it not as a chore, but as a quick, two-minute ritual. This small investment of time prevents that frustrating sticky buildup, making deep cleans a rare and much easier task.
It’s the same logic as brushing your teeth daily to avoid a major dental procedure. A few seconds of care after each use will reward you with a grinder that glides smoothly and grinds perfectly, every single time.
The 30-Second Quick Clean
The most powerful habit you can build is the post-grind brush-down. Keep a small, stiff-bristled brush nearby—a firm paintbrush or a dedicated grinder brush works wonders. After you’ve emptied your flower, simply give the teeth and chambers a quick sweep to dislodge any loose particles.
This simple action prevents fresh plant matter from getting compacted and hardening into that stubborn, resinous cement that’s so difficult to remove later.
Pro Tip: Storing your grinder in a cool, dry place also prevents resin from becoming overly sticky. To learn more about proper gear care, check out our guide on the best cannabis storage containers and keep your entire setup in prime condition.
Keep Your Threads Gliding Smoothly
What’s the first sign of a neglected grinder? Sticky, squeaky threads that turn opening and closing it into a workout. This resistance is caused by tiny plant particles and resin getting impacted in the grooves.
You can prevent this entirely with a tiny drop of food-grade lubricant like mineral oil or hemp seed oil on the male threads. A cotton swab is perfect for applying a thin, even coat. This simple trick keeps everything turning like butter and protects the threads from wear and tear.
The payoff for this minimal effort is huge. Users who perform regular maintenance report up to 80% better flavor and a 15% increase in kief collection because the screen remains unclogged. In medical cannabis markets, where purity is paramount, 9 out of 10 clinics recommend weekly grinder cleaning. You can read more about these findings on grinder maintenance.
Got Questions About Grinder Cleaning? We’ve Got Answers.
Even with the best guide, a few questions are bound to pop up. Perfecting your grinder cleaning routine can take a bit of trial and error, so let’s tackle some of the most common queries.
How Often Do I Really Need to Clean This Thing?
Honestly, there isn’t a one-size-fits-all answer. It all depends on your usage. If you’re a daily user, a deep clean every 1-2 weeks is a great rhythm to maintain. This prevents serious buildup and ensures you always get a fluffy, consistent grind.
For more casual users, a monthly deep clean is usually plenty to keep things running smoothly.
But the best indicator is the grinder itself. The moment you feel that sticky resistance when you twist it, or you see that the kief screen is clogged, it’s telling you it’s time for a cleaning.
A happy grinder spins freely. A sticky one is crying out for a spa day.
Is There a Good Substitute for Isopropyl Alcohol?
While 90%+ isopropyl alcohol is the undisputed champion for dissolving resin on metal grinders, you have other options in a pinch.
High-proof grain alcohol, like Everclear, is an excellent alternative that works just as effectively. Some people also use high-fat liquids like boiling whole milk or coconut oil. The fats bind to the THC-rich resin, but be warned: this method is significantly messier and will require a lot more scrubbing and rinsing to remove the oily residue.
For a hassle-free, powerfully effective clean on metal, high-proof alcohol remains your best bet.
Help! My Grinder Is Still Sticky After Cleaning.
This is a common issue, and it almost always points to one of two culprits: the alcohol soak was too short, or the alcohol’s concentration was too low to tackle the level of buildup.
The fix is simple: do it again. Give your grinder another 30-minute soak in the alcohol. For grinders with years of caked-on residue, a second round of soaking after an initial scrub often does the trick. Also, ensure you’re using a stiff brush to get deep into the threads and the crevices around the teeth—that’s where the stickiest gunk loves to hide.
At Elevation Headquarters, we believe that premium cannabis deserves premium tools. From precision-engineered grinders to New York’s finest flower, we provide everything you need to elevate your session. Visit our dispensary or check out our online shop and discover the difference quality makes.